The annotative property was added in the AutoCAD 2008 version.
It's a tool that helps in keeping size of annotations like dimension, text and more constant throughout different viewports of the drawing.
Prior to the induction of the annotative scale in AutoCAD, the task of plotting objects with the correct scale for different viewports was a tedious job.
One had to make multiple copies of the same object for different scales and the objects were then put on different layers and for each viewport or scale of drawing only appropriate layer was turned on keeping rest of the layers off.
This process resulted in an unnecessary amount of data in drawing leading to confusion and larger file size.
The annotative property took this trouble out of drawing process.
If you prefer the video then here it is, else continue to read on.
Understanding Annotative property
Let’s assume that we have a floor plan with maximum exterior dimensions of 525 inches and 336 inches.
Now in order to plot this drawing on a normal A3 size sheet of paper which is 420 X 297 mm we need to decrease the overall scale of drawing to appropriate size.
Let’s select a scale of ¼” = 1’ which in layman’s term can be summed up as 0.25 inches on paper equals 1 feet on actual drawing.
Now with this scale, the drawing looks like this on A3 paper.

Here all dimensions, text and blocks are clearly visible with respect to the viewport.
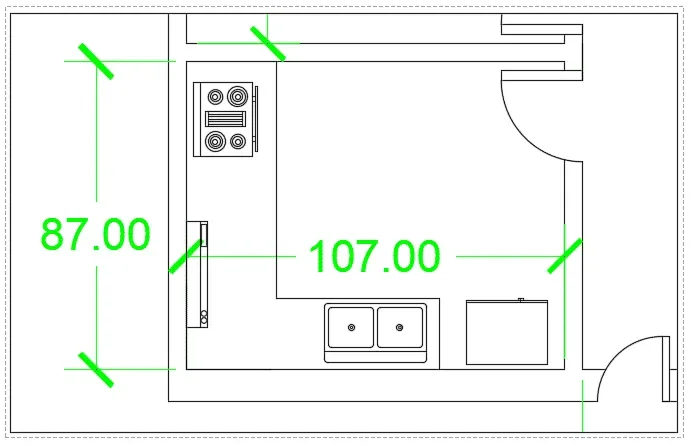
Now here is another drawing in which only the kitchen is included at a zoomed scale of 1” = 1’

Now obviously with a change of scale of viewport the scale of dimension text also changed in same proportion which you can see in the drawing but do we really need large dimension text as seen in figure above?
70 lessons| Easy Level
If you are absolute beginner of AutoCAD then you can get started right from scratch using this free course.
Obviously, we don’t need large text we want uniform text and dimension size throughout different scales of the drawing.
So we can assign the annotative property to dimension and text and keep its size fixed in different scales throughout the drawing.

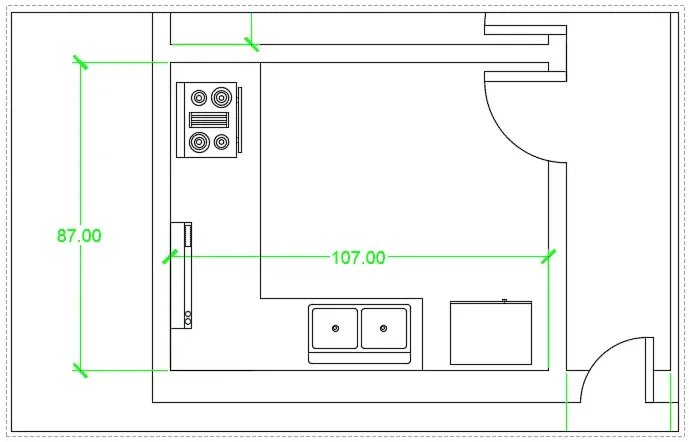
Figure above is again plotted at the scale of 1”=1’ but with annotative property assigned to the dimension text in which size of dimension text is equal to its size in A3 sheet (figure 1) where the scale was ¼”=1’ making it look more consistent.
Making Annotative dimension
To make annotative dimension style type DIMSTYLE on the command line and press enter.
A new dimension style manager window will pop up, click on the new button on right side of this window.
Now give your dimension style a name, I am naming it as “My Anno Dim” and check the annotative radio button then click on continue.

New dimension style window will pop up with multiple tabs, select text tab and change the size of text to 1/8” or whatever paper height of text you want to keep in all scales.
Similarly, change arrow size from symbols and arrow tab to 1/8”.
If you already have a dimension style for your drawing and you want to make that style annotative then follow these steps.
Select your dimension style from dimension style manager then go to fit tab and check the annotative radio button from the scale for dimension features panel.
Click on OK to close new dimension style manager and then click on close from dimension style manager window too.

Now our drawing is prepared with a new annotative dimension.
Make My Anno Dim dimension style current by selecting it from dimension style drop down and add dimensions to the drawing in model space using current annotative dimension style.
Adding Scale to Annotative dimensions
Before preparing the layout for final plotting we should decide the scales in which we want to plot our drawing.
Let’s assume that we want to plot the drawing on A3 paper size and on three different scales 1”=1’, 1/8”=1’ and ½”=1’.
70 lessons| Easy Level
If you are absolute beginner of AutoCAD then you can get started right from scratch using this free course.
In order to make annotative dimensions visible on all of these scales, we need to add these scales to the dimensions.
From status bar click on add scales… button Capture to turn it on.
You can also turn on show annotation objects button to see a real-time effect of the change in scale on your drawing, see figure 6 for reference.
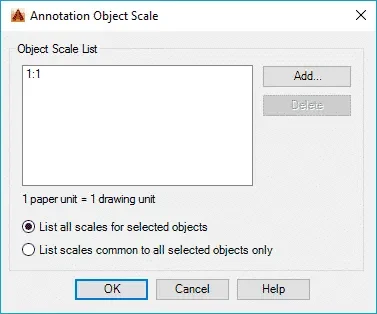
For adding scale in an older version of AutoCAD type OBJECTSCALE on the command line and press enter then select all dimensions for which you want to add scales then press enter again.
Annotation object scale window will pop up, select add button and add scales to the list and click OK to close all open windows.

Now click on scale drop down menu next to add scales button and select scale 1”=1’ from the drop down menu, repeat the process for 1/8”=1’ and ½”=1’ scales also.
Now the scales are added to the drawing and our drawing can now be prepared for plotting.
Do not add many scales to the annotative dimensions because it may cause a lot of background processes and as a result, your software performance may suffer.
Preparing layout views
Go to layout tab and type PAGESETUP on the command line and press enter.
Select modify from page setup manager window and select ISO A3 paper size from the Paper Size drop-down menu of page setup window.
Click OK to close page setup window.
Now create three rectangular viewports in paper space and assign scales of 1”=1’, 1/8”=1’ and ½”=1’ to three viewports.
You will notice that although we have different drawing components like text, blocks and geometries on different scales but the size of dimension text is constant throughout the viewports because of annotative property assigned to them.
If you change the scale of any of these viewports to the value other than the one which is assigned to annotative dimension then the dimensions will not appear for that scale.
In order to make dimension appear for a new scale, you need to add that scale to the annotative dimensions as explained above.
Changing visibility of annotative object
You can change the position of your annotative object according to the scale.
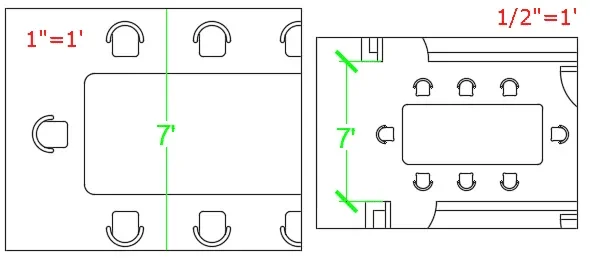
For example, in the scale of 1”=1’ the dimension appears in the middle of the dining table but for a scale of ½”=1’ the dimension may be made to appear outside dining table for the same dimension as shown in figure 8.

To change the visibility of these objects simply activate viewports by double-clicking within them and move dimensions using grips to the position where you want it to appear for the particular viewport.
The position of the annotative object will not change in another viewport.
Summary
The methods explained in this article can be used for assigning annotative scales to other objects like Blocks, Hatch and MText also.
The annotative feature is a great time saving and productivity tool that should be used in the drawing wherever required.
This tool not only helps in making a more organized and professional drawing but it also helps in keeping useless clutter out of the drawing that you are forced to use if not using annotative property.
This topic is also part of AutoCAD certification exam so you should cover it properly.
Do you have questions related to this tip? Let me know in comments below.


