Making drawings precisely is not possible without the use of AutoCAD object snaps.
These options not only let you make drawings precisely but they also speed up the drawing workflow.
In this article, I have discussed all of these object snap options and explained them in detail.
Just in case you are wondering object snap is the status bar toggle option with snap points as shown in the following image.

As you can see in the image above, I don’t keep all the object snap points active only a few of these points are checked and in my example, these points are Endpoint, Midpoint, Center, Intersection and extension.
You don’t need to keep only these points active but it’s always advisable to go with the minimum number of snap points.
When required you can activate any specific point then make your drawing using that point and then deactivate it again.
70 lessons| Easy Level
If you are absolute beginner of AutoCAD then you can get started right from scratch using this free course.
If you keep all the points active then, in a drawing with several points in close proximity AutoCAD might highlight a point that you don’t need and you may end up selecting a point that you don’t need.
If object snap is active and you have an active command where you need to select a point the object snap function will kick in and it will highlight the checked points of the object snap menu.
This helps in exactly snapping to the correct point which is essential to making drawings accurately.
If your object snap is not highlighting the points then make sure that the Object-Snap icon is highlighted in blue as shown in the image above and your required snap icons are checked in the object snap menu.
Now that you know what object snaps are let’s explore what these individual snap points are one by one.
Endpoint
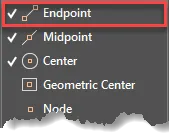
Endpoints are the points where a curve like Line, Arc, Spline etc. terminates.
With endpoint snap active AutoCAD will highlight the ends of simple geometries when you bring your cursor to those endpoints with an active command where point input is required.
It is the most basic and simple kind of Object-Snap which you would need to keep active most of the time.
As an example, create a line, a polyline, an arc and a spline.
Now select the line command and bring your cursor close to the endpoints of the geometries that you’ve made.
You will notice that the endpoint will highlight in the green box as shown in the following image.

Even if the cursor is not exactly on the endpoint when the Endpoint Snap icon appears just click and it will snap exactly to the highlighted endpoint.
Midpoint
Midpoint Object-Snap allows you to Snap to the midpoint of any line, polyline, arc or spline.
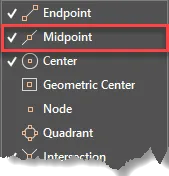
With the midpoint snap selected and a draw command active move your cursor close to the mid-point of a curve.
A green triangle indicating the midpoint snap will show up and when you click the cursor will snap exactly to the mid-point.

Once again, it doesn’t matter where you click, as long as you see the Midpoint Snap Icon it will always snap to the highlighted midpoint.
Center
With Center Snap, you can snap to the center of any Circle, Ellipse, Arc, or Elliptical Arc.
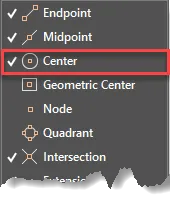
Select the center snap from the object snap list.
Create one of the curved objects mentioned above then select any Draw command like LINE and hover your cursor near the perimeter of the circular object.
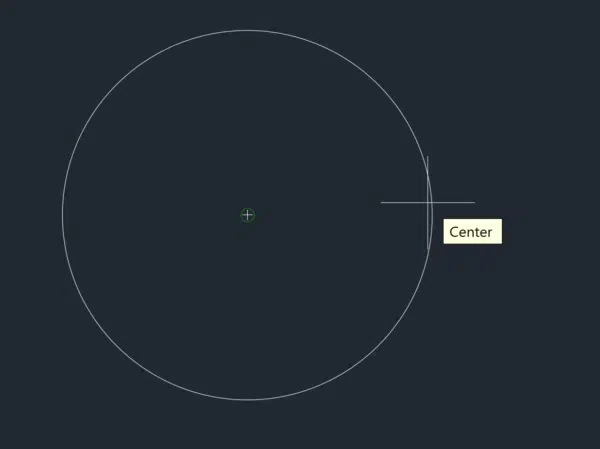
Hovering near the perimeter of the object will trigger a plus-sign type center object snap, if you click now the line will snap exactly at the center even though you are hovering at the circumference.
Geometric center
The Geometric Center option allows your pointer to snap to the Geometrical Center (Centroid of the closed shape) of objects in AutoCAD.
It doesn’t work with objects that were created with only the Line tool as it needs to be a closed object made with single geometry like a polyline or spline.
Use the Polygon tool (or Polyline or Spline if you prefer), to create any kind of closed object.
For simplicity, I created a triangle using the Polyline Tool.
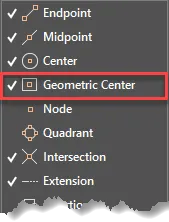
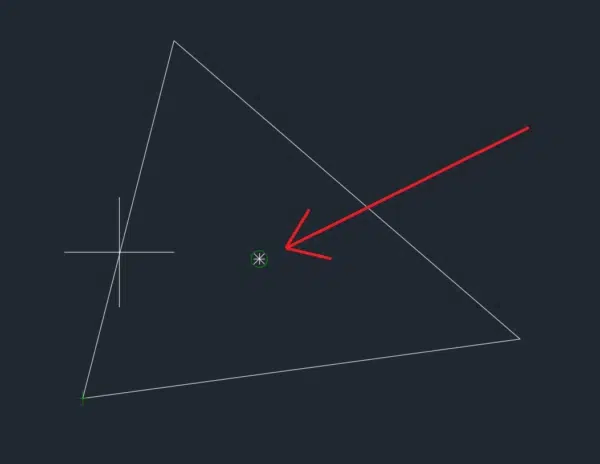
With the “Geometric Center” snap active on the object snap menu hover your cursor close to the perimeter of the drawing.
Make sure a draw command like LINE is active before you hover your cursor over the object.
You will see an asterisk or white 8-pointed star appear in its center, and you can easily snap to that, this point is the geometric center.
What if you already made a closed object using only the Line tool, and you want to find its geometric center?
In this case, you can join the lines together using the JOIN command and the closed geometry will be converted to a single object made with a polyline and now you can snap to its geometric center.
70 lessons| Easy Level
If you are absolute beginner of AutoCAD then you can get started right from scratch using this free course.
Node
In AutoCAD, a Node is a single point made with the POINT Command.
Use the POINT Command (or use the PO command) then click in the drawing area to make the node.
You can click as many times as you want to make multiple points, or you can also type in the coordinates if you want the point at a specific location.
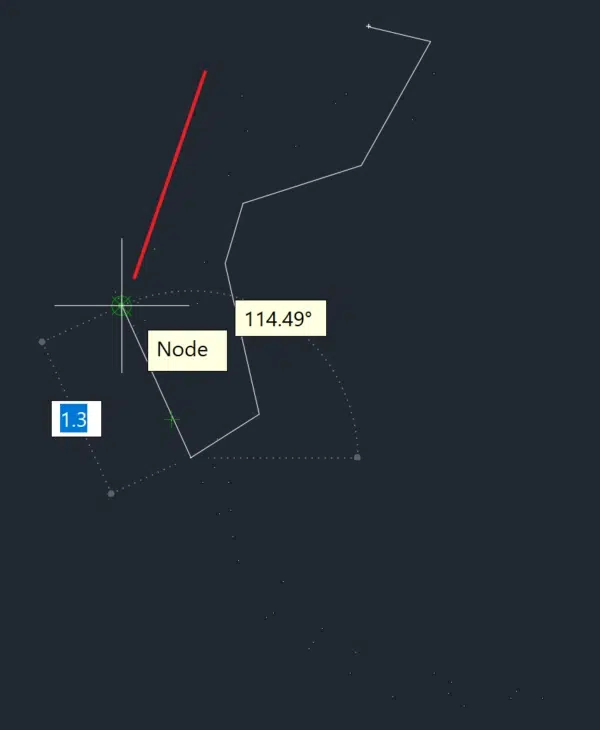
I’ve made my points in a sort of arcing pattern.

It is a little difficult to see it in the image above and you may have to increase your device’s brightness for improved visibility.
To make them prominent and clearly visible in the drawing you can also change the point style in AutoCAD.
To make these points selectable just like every other object snap option in this case too you need to first make sure that the “Node” snap is active from the object snap menu.
Then start a draw command like LINE and hover your cursor close to a node or point and the cursor will snap to it.
Quadrant
Let’s make a circle using the CIRCLE command, make it whatever size you like.
Now, click on the circumference of the Circle to select it. You will notice 4 blue squares on the circumference and one in the center.

The 4 blue squares on the circumference of the Circle are called Quadrants.
The Quadrant option allows your pointer to snap to the quadrant points on the circumference of the circle, arc or an ellipse.
To select these quadrant points, select the Quadrant option from the object snap menu and you will be able to snap to the quadrants of your geometry.
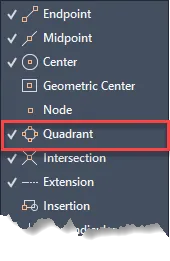
Quadrant snaps on the circle, arc and ellipse look like the image shown below.

Intersection
If you have Intersection snap active, you will have the ability to snap your cursor to the point of intersection of geometric objects.
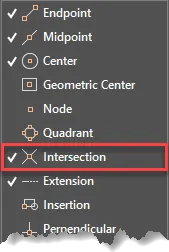
To see it in action make sure the intersection is active in the object snap menu and then activate any Draw command.
Now move your cursor close to the point of intersection of any two objects.
A green X marker will show up which is the intersection snap marker, click when the marker highlights and the cursor will snap to the point of intersection.
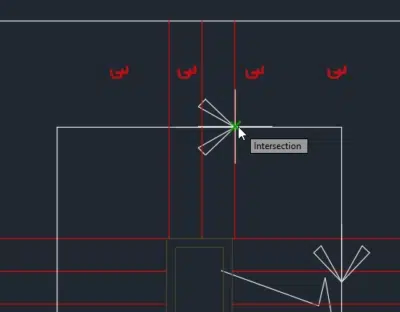
If, however, the intersection point also happens to be another point like the midpoint or when another point like midpoint or endpoint is very close to the intersection point you will see those points.
In this case, you can deactivate the snaps from the object snap menu that you don’t need and only keep the required snaps active like the intersection in this case.
It can get very difficult if Intersection is turned on with a lot of other Object-Snaps.
In particular, I would avoid using it with Perpendicular, Insertion or Apparent Intersection.
It can cause unexpected and inconsistent results.
Extension
Extension Snapping will keep things lined up the way that they should be.
Essentially this option allows you to have your pointer snap to points that are past an endpoint.
This takes Object Snap to the next level, and it comes in particularly useful when working on wall options, room sizes, and any other sort of speculative design.
To begin, make sure that your Endpoint, Midpoint, and Extension OSNAP Options are turned on.
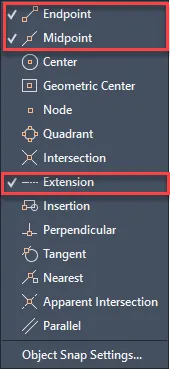
The Extension option is easy to explain even if we start off with one simple line.
So, let’s do that, notice my line is slightly angled.

The Extension option allows you to forgo Ortho Snapping in cases of matching angles up.
Now make another line that snaps to an endpoint of our original line.
Drag the mouse down (or up) until your tracking line turns green.
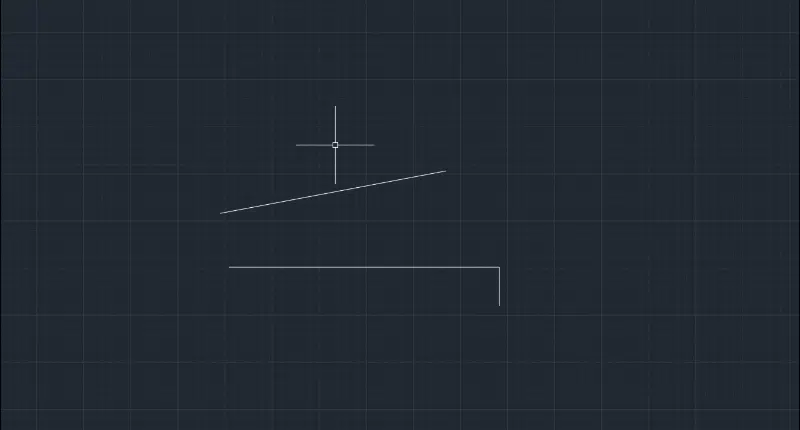
Do you see? The direction of the line is maintained by the Extension snap.
What is really amazing is that Extension Object snap works with arcs as well.
You can see for yourself that if you create an arc, you can create an extension of it if you have Extension Snap turned on.
You can accomplish this by creating an arc, and then using the LINE command with the Extension Snap Option ON to snap your line’s ending point to an extension of the arc.
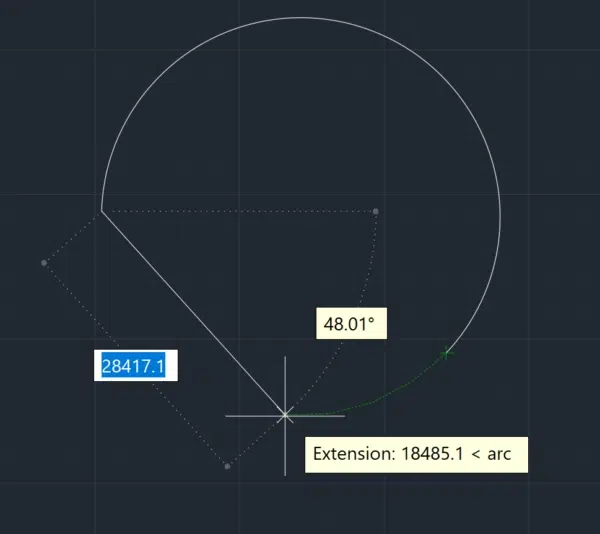
Once you find the arc’s extension, you can move up and down it by slowly dragging your mouse.
Notice the green tracking arc in the figure above? Use that.
Insertion
Insertion snap is related to the blocks and their base point.
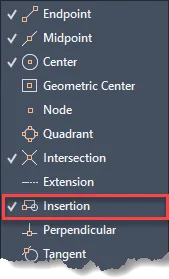
When making a block in AutoCAD there is a prompts for selecting the base point.
This base point is the insertion point which shows up when the insertion object snap is active.
In this case, I have a Window block and when you select it only a single grip shows up which happens to be the base point of the block too.
In the image A below base point is highlighted with a blue grip shown inside the red circle.
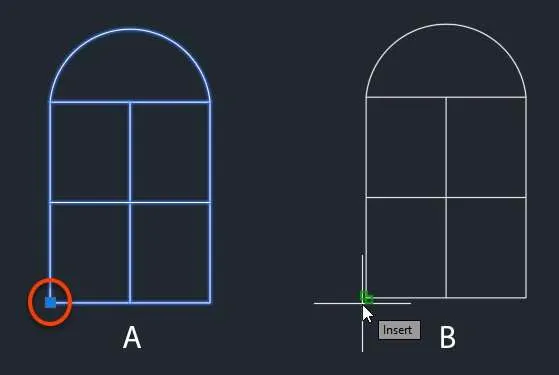
The Insertion point alone won’t show up if it overlaps with other points.
Like in the example above the insertion point also happens to be the end point of the lines that make the block.
So, in this case, instead of Insertion point AutoCAD will show Endpoints.
70 lessons| Easy Level
If you are absolute beginner of AutoCAD then you can get started right from scratch using this free course.
But if you only want to highlight the Insertion point then deactivate the endpoint snap and then the insertion point will show up when the cursor is moved closer to the lower left corner of the block.
Perpendicular
The Perpendicular Snap Option snaps in such a way that it places your selected line perpendicular to another reference line in the drawing.
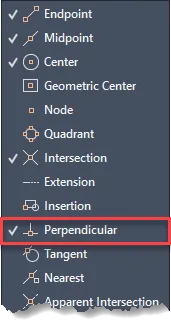
To use it make sure you have Perpendicular Snap turned on as shown in the image below.
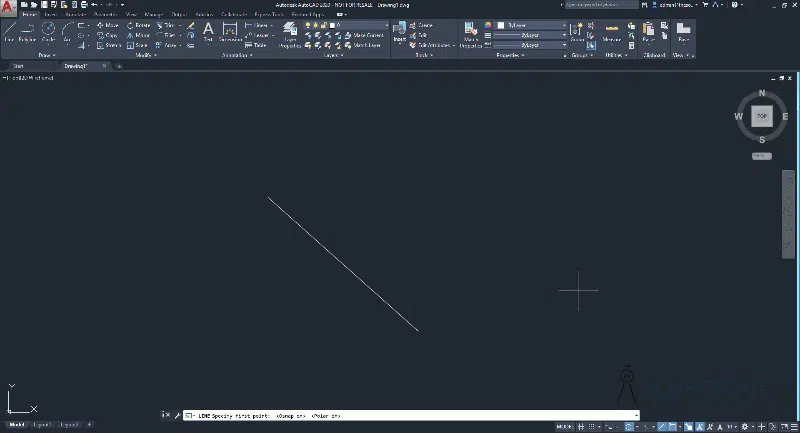
Start the LINE Command and click at a point close to the reference line and then move your cursor over the reference line.
The perpendicular snap will show up at the point of perpendicularity on the reference line as shown in the animated gif below.
Tangent
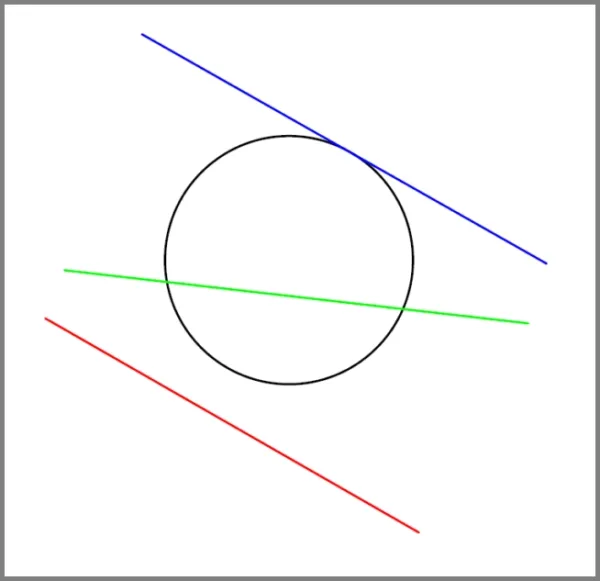
Tangent is a point where two geometries meet at just a single point.
An example of the tangent is shown in the image below, here the red line is not tangent to the circle as it is not touching it.
The green line is intersecting the circle at two points so it’s also not tangent, but the blue line is touching the circle at an exactly single point and hence is tangent to the circle.
Just like other snaps, for making tangents too you need to keep it active in the object snap menu.
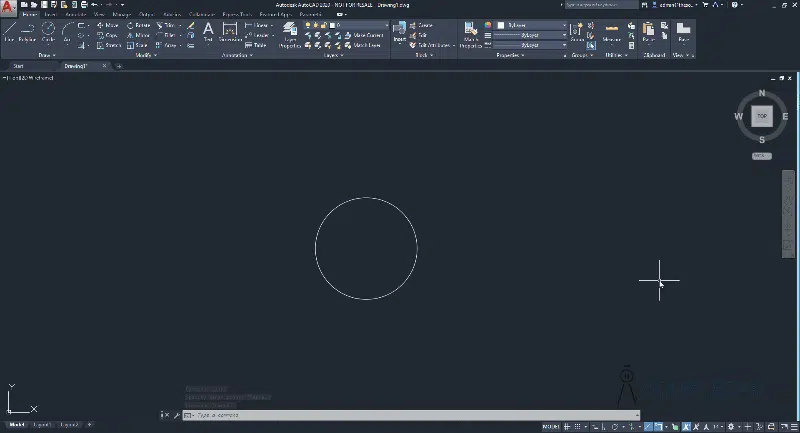
Once you have activated it you can then start with a line and then move it close to the circumference of a circle, arc, ellipse or spline and the tangent snap will show up.
Click to make the tangent line on the curve as shown in the animated image below.
Nearest
Nearest is the snap option that works with this simple principle.
You want your cursor to snap to the nearest point on the curve from where it is clicked.
To understand this snap I will start by making a simple circle.
After you’ve created your circle (or any shape really, it doesn’t matter), make sure Nearest snap is turned on.
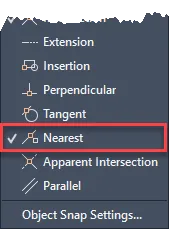
Now create a line and hover over your circle’s circumference until you see the Nearest snap icon.
Notice you can move all around the circumference, and you will nevertheless remain snapped to the circle.
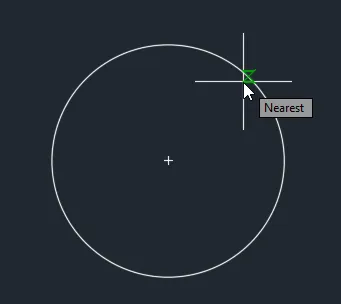
Considering this, it is important to note that Nearest Snap does not work very well when it comes to matters of precision, particularly if you are going for a specific point on a circle, line or other curves.
However, it is very useful when what you need is for your cursor to snap to the nearest point on the drawing.
This is a good time to note that Intelligent Snap Options like “Nearest” don’t work so well when turned on with Basic Snap Options, and vice versa.
For instance, what use is Intersection Snap, when your cursor is constantly snapping to the Nearest point?
Keep this clutter-free and use the minimum number of Snap Options possible.
This will help guarantee maximum efficiency and minimum errors in all your drawings.
Apparent Intersection
Apparent Intersection is a tricky Snap Option to work with, but it can be useful when used properly.
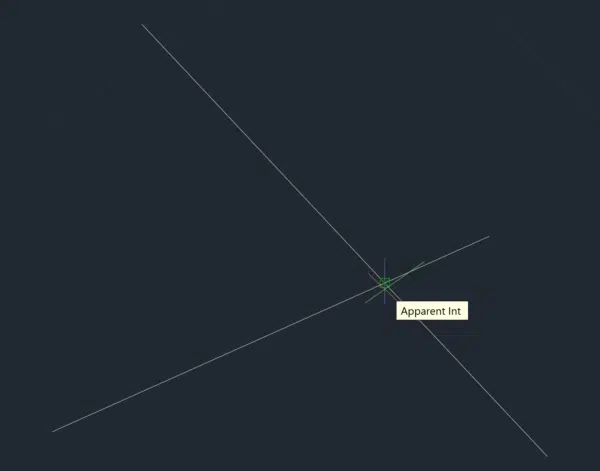
Apparent Intersection snaps your cursor to a point where 2 objects technically don’t intersect, but because of the View, they appear to.
This kind of situation arises in the 3D plane when you have drawing in X, Y and Z axis.
NOTE: Don’t keep Intersection and Apparent Intersection active simultaneously as it can lead to unintended results.
Here is an example of how the geometries with apparent intersection points will look.
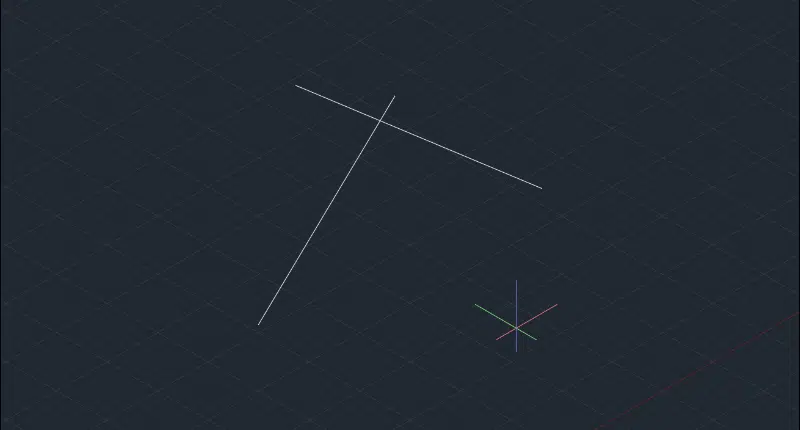
In the animated image above the lines don’t actually intersect but from different perspectives, they may appear intersecting which is what the apparent intersection snap will show.
For our purposes, it is best to turn off all Object Snaps except for Apparent Intersections.
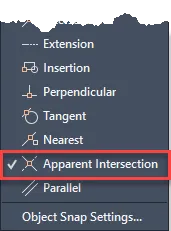
From then on, things are simple.
Simply run the LINE command, or a similar command, and hover over the apparent intersection, and the “Apparent Intersection” icon, which is a green square with an X in the middle, will appear over it.
Parallel
Parallel Object Snap is really fun to use, before using it, make sure you have your Ortho Snap turned off.
The Ortho Snap icon looks like the image shown above and is visible on the status bar of AutoCAD.
After making sure Ortho Snap is turned off, make a line aligned to any random angle.
Subsequently, turn off every Snap Option except for Parallel.
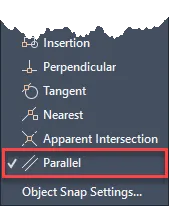
Start the line command again then click at a point near the reference line you created earlier.
Then hover your cursor over the existing line till the parallel snap shows up.
Then move your cursor out and a tracking line will show when the line is parallel to the existing reference line as shown in the animated image below.

Parallel Object Snap is great for situations where you are using angles too precise for Ortho Snap, or for creating similar objects and matching them up to each other.
Suppressing Running Object Snaps
This feature in AutoCAD allows you to temporarily override object snaps using a key combination on your keyboard.
70 lessons| Easy Level
If you are absolute beginner of AutoCAD then you can get started right from scratch using this free course.
This is useful in the event that your cursor keeps snapping to an Object Snap point that you want to be ignored specifically for that instance.
To bring Object snap suppression in action, select the line command (or any other draw command if you prefer) and press the Shift key and don’t let it go.
Then right-click on your mouse and you will see a temporary object snap override menu.
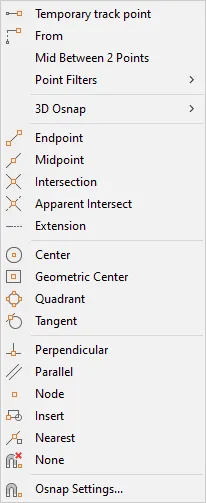
Select the object snap that you want to activate from this list and then AutoCAD will only snap to the point selected in the override menu.
Once you select your snap point the override will deactivate and all points selected in the object snap menu will become selectable again.
This method is faster and more efficient than deactivating all the snaps that you don’t need and keeping only the required one active from the object snap menu.
Summary
Objects snaps are indispensable tools and you can’t make precise drawings without using them.
I hope this article explained everything you needed to know about object snaps.
If you have questions feel free to let me know in the comments below.

