AutoCAD Revision clouds are geometries used for markup as a means to drive attention to a certain part of the drawing the require corrections.
The revision clouds are Polylines in the shape of connected arcs and they can also be modified like a Polyline.
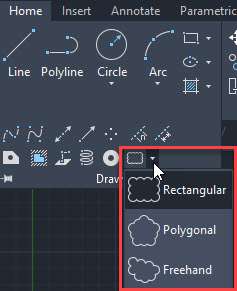
Basically there are three types of revision cloud, Rectangular, Polygonal and freehand.
You can find the revision cloud on the expanded draw panel of Home tab as shown in the image down below.
So, lets explore all these revision cloud tools in detail.
Creating a Rectangular Revision cloud
To create a Rectangular revision cloud select the "Rectangular" option from revision cloud drop down menu as shown in image above.
Alternatively type REVCLOUD on the command line and press enter.
Click at rectangular from the command line options and then click at two points in the drawing to make the rectangle.
A revision cloud will be made in the drawing area as shown in the image below.
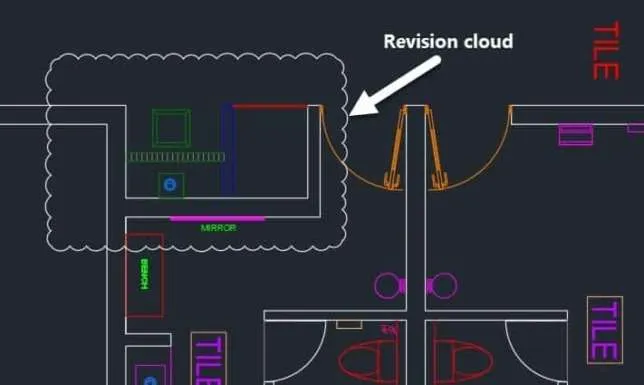
This revision cloud will take the shape of a rectangle and just like a rectangle you can select it's multifunction grips to modify it's shape or size as well.
Creating Polygonal Revision cloud
To create a polygonal revision cloud with multiple vertices select the Polygonal option from the revision cloud dropdown.
Alternatively you can use REVCLOUD command and then select the Polygonal subcommand from the options.
70 lessons| Easy Level
If you are absolute beginner of AutoCAD then you can get started right from scratch using this free course.
With this revision cloud you can create a polygon with any number of sides.
This revision cloud is specially helpful where you want to enclose area like the image shown below.

Freehand Revision cloud
The third revision cloud in the list is Freehand.
You can select this Revision cloud from the drop down menu of Draw panel on Home tab or you can type the command REVCLOUD and then select the freehand option from the command line.
To make a freehand revision cloud start the command then click at a point to start the cloud and let go your mouse.
Now move your mouse freely to create the cloud shape and then move it close to the starting point and the cloud will close automatically.
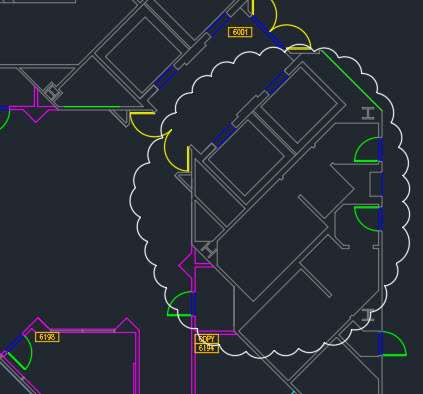
Following image shows the example of a freehand revision cloud.
Converting drawing into revision cloud
You can also convert closed geometries like a Polygon, Ellipse or a Circle into a Revision cloud.
To do so, make a closed geometry then select the REVCLOUD command.
Select "Object" option from the command line and then click on the geometry from drawing area which you want to convert to a Revision cloud.
If you want to reverse the direction of arcs select Yes from command line else directly press enter to accept the default arc direction.
Modifying the Revision cloud shape
As mentioned earlier, revision clouds are Polylines with the connected arc like geometry.
You can modify the revision cloud shape using it's grips just like any other Polyline curve.
You can select any grip and move it in the drawing area to change the shape of Revision cloud.
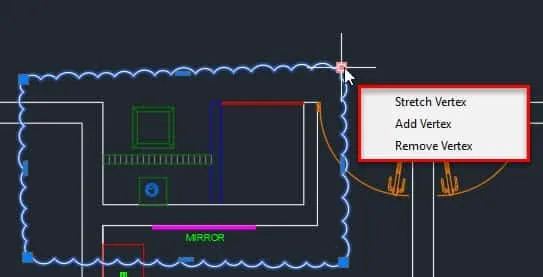
To add or remove more vertices from revision cloud move your cursor to any of the grips and hold it there.
Then select Add Vertex or Remove Vertex and it will add more sides on your revision cloud.
You can also add more grips on the revision cloud by changing the REVCLOUDGRIPS system variable to 0.
Changing system variable to 0 or OFF will make Polyline grips on every arc of the revision cloud.
Changing the system variable to 1 or ON will make grips only on the segments of the revision clouds thereby simplifying it as shown in the following image.

The properties of the revision cloud can also be changed using the PEDIT or Polyline edit command.
For our current example, I will change the width of revision cloud using the PEDIT command.
Type PEDIT on the command line and press enter, then select the revision cloud whose property you want to change.
70 lessons| Easy Level
If you are absolute beginner of AutoCAD then you can get started right from scratch using this free course.
Select Width from the command line and specify the width for the revision cloud and press enter twice.
The width of revision cloud will change as shown in the image below.

Modifying revision cloud type
If the arcs used in the revision cloud are not of standard length or type then you can modify the average arc length of the revision cloud and also the type of arc to be used for the revision cloud.
To specify new arc length of Revision cloud type REVCLOUD on the command line and press enter.
From command line select Arc length option then specify an approximate arc length in the next prompt.
This will now make your revision cloud arcs close of the specified length.
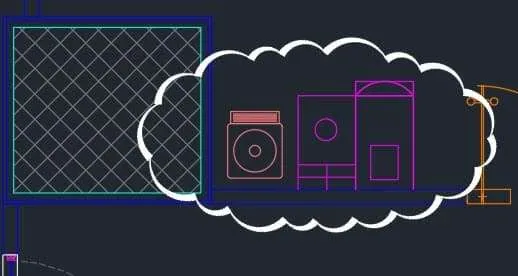
You can also change the style of a revision cloud from a simple set of connected arcs to a calligraphy styled arcs.
To make this change select the REVCLOUD command and select "Style" from the options of the command line.
Select calligraphy from provided options and make the revision cloud.
The resulting revision cloud will look similar to the image shown below.
Summary
Revision cloud are great markup tools and they should be used only where you want to highlight corrections.
Before sharing the final drawing for production don't forget to remove these revision cloud from the drawing.
If you have questions related to the revision cloud do let me know in the comment section down below.

