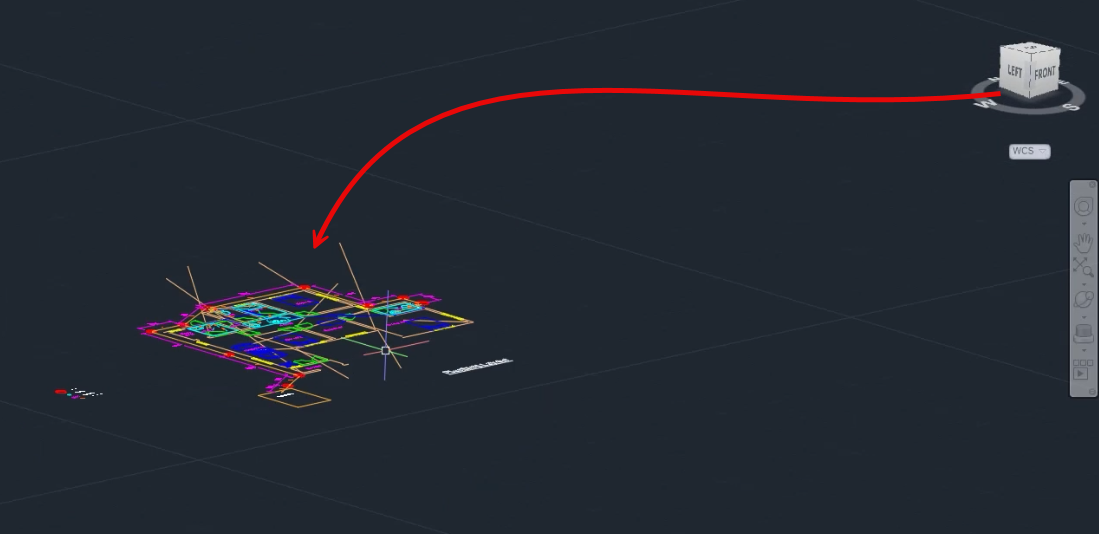
It seems like for almost no reason some AutoCAD drawings made on flat 2D plane develops lines, polylines and other features along Z axis.
Like the image shown here.

To fix this problem and to flatten AutoCAD drawing you can use the methods explained in this article.
These methods work for AutoCAD as well as AutoCAD LT.
If you prefer the video version of this article then here it is, but if you prefer the article then read on.
Flattening drawing in AutoCAD or AutoCAD LT
This method works for AutoCAD as well as AutoCAD LT.
This method involves moving all objects in the drawing to infinity along the Z axis and then moving them back again to XY plane.
While this method may seem unconventional, it is the only one available if you are using AutoCAD LT.
First, select all objects from your drawing that you want to flatten, then use the MOVE command (M or MOVE) and specify a base point for the move operation.

In this case, click on any point (preferably lower left corner of the drawing) and then move the drawing to origin by typing the coordinates 0,0,0 on the command line.
Select all the objects of your drawing again and select the MOVE command again.
Specify the same base point (lower left corner) for the move operation, and then type 0,0,1e99 and press enter key.
This will move your entire drawing to infinity along Z axis.

Here 0,0 is the coordinate of X and Y axis but 1e99 is 1x10^99 which is essentially 1 followed by 99 zeroes.
In AutoCAD, the concept of using "∞" (infinity) as a coordinate is not directly supported so you can use 1e99 as a workaround.
Now we will move the entire drawing again back to XY plane.
For that double click your middle mouse wheel and the entire drawing will show up.
Select the drawing then type M for move command and press enter key.
Now select the lower left corner as the base point again and then type 0,0,-1e99 as the point where you want to move the entire object and press enter key again.
Now your drawing is back again at flat XY plane but this small process will eliminate any extensions along Z axis and your drawing will be completely flat.
70 lessons| Easy Level
If you are absolute beginner of AutoCAD then you can get started right from scratch using this free course.
Using FLATTEN command
The FLATTEN command in AutoCAD is perhaps the most straightforward method for flattening drawings.
It converts all selected objects to a 2D representation by projecting them onto the current viewing plane.
To use the FLATTEN command, simply type FLATTEN in the command line and press enter key.
Alternatively, navigate to the Express tab, under the Modify panel, click on the dropdown menu, select the Flatten objects command then select the objects you wish to flatten, and press Enter.

AutoCAD will prompt you either to remove hidden lines or to keep them, in this case, type no on the command line to keep the hidden lines and then press the enter key.
That's it, AutoCAD will then flatten the selected drawing, removing any Z-axis elevation and converting them to 2D as shown below.
Summary
Older drawings tend to develop this issue of drawing along Z axis and as you saw in this article it's fairly easy to fix this issue in AutoCAD or AutoCAD LT.
Let me know in the comments down below if you used these methods to flatten AutoCAD drawing and if it worked for you.
If it did not work then also let us know in the comments down below.


