Under regular circumstances it is not recommended to import DWG files in REVIT but there are some situations where you can import them in a useful way.
These situations are:
- Importing CAD file to Revit as an underlay
- Importing CAD file to Revit as a family
So, here in this article let’s explore how you can import your AutoCAD file into Revit in a proper way without any errors.
For that we will start with the first method which is importing CAD files as an underlay.
Method 1: Importing AutoCAD file to Revit Project
If you have made a 2D drawing in AutoCAD (or if you have a drawing file from stakeholder) and you want to use it as a reference for making a Revit project, then you can use this method to import the AutoCAD file to Revit.
66 lessons| Easy Level
This course is for an absolute beginner of Revit architecture software. If you want to get started right from scratch then this is the course for you.
But before you do that it’s important that you clean up the drawing to remove any unwanted clutter that might end up in your Revit project.
Cleaning up the drawing
For this example, we will use the drawing show in the following image.

As you can see this drawing has a lot of elements like doors, windows, walls etc. added to it.
The drawing may contain blocks, layers, text and dimensions styles and other objects that may not be used directly in the drawing.
You can remove these objects using the PURGE command to clean up the AutoCAD drawing.
You can also delete any text, dimension or table available in the drawing as they are needed for the Revit project.

Separate the drawing to different floors
After the drawing is cleaned the next step is organizing it.
If the drawing made in AutoCAD has more than one floor, then you need to save each floor plan as separate DWG file with the same base point.
In our example drawing you can see that the drawing in AutoCAD consists of two floors.
Now before importing them to Revit, we need to separate the drawings into two different files.
To do that you can create a copy of AutoCAD files from the windows file manager and rename them as Ground floor and first floor as shown below.

Now open the file named ground floor.
Once the drawing is open, you can drag and place the origin at the lower left corner of the drawing or you can type the command UCS and align it to the lower left corner of the drawing as shown below.

Now that the origin is assigned to the lower left corner of the drawing you can delete the first-floor design from the drawing.
Save the drawing and the resulting drawing will look like the following image.
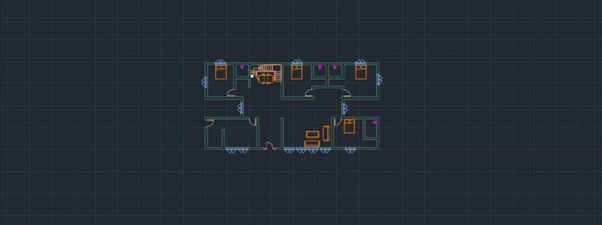
Open the First floor drawing and repeat the same step to assign the origin to the lower left corner of the ground floor.
Then we need to select the entire element in the first floor and right click to group them as shown below.

Now you can move the first-floor design on top of the ground floor so they get aligned correctly as shown below.
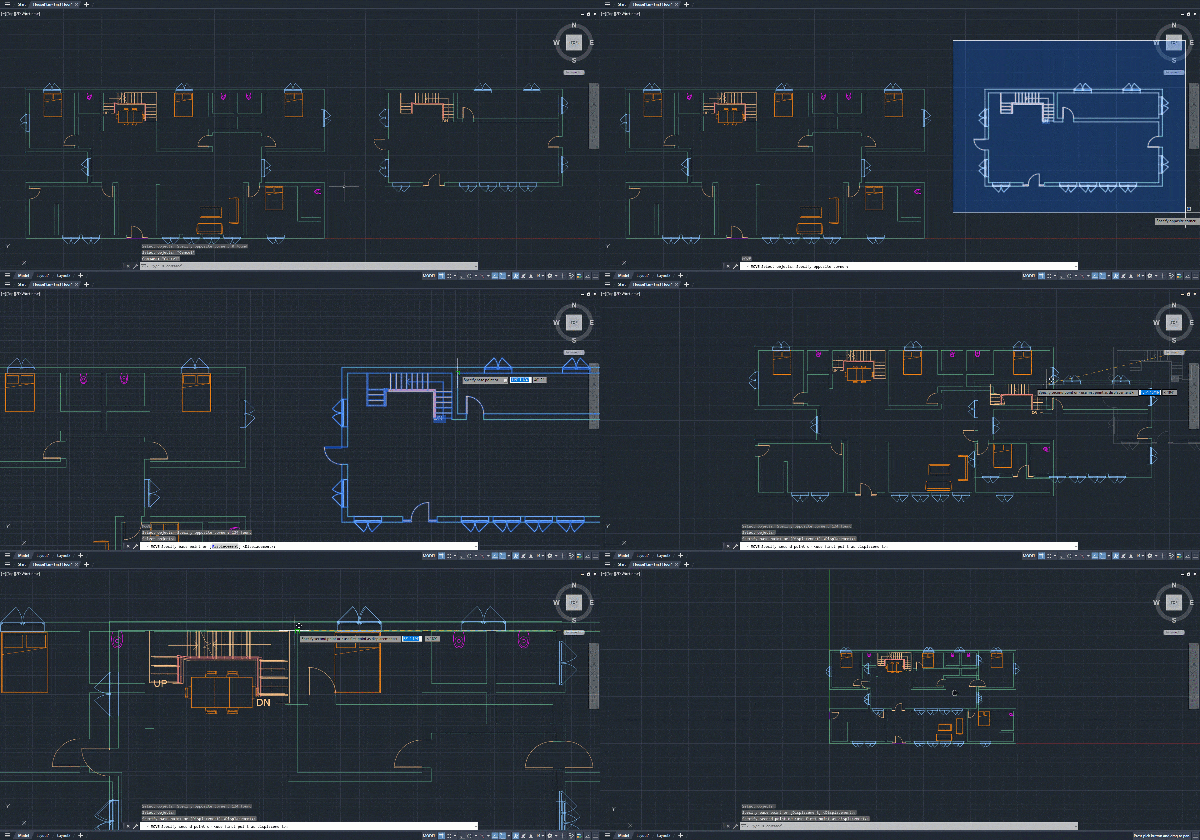
Now delete the ground floor from the design to get the final output as shown below.

As we grouped the first-floor plan selecting and deleting it will be easier as clicking on any object of the first floor plan will select the entire grouped drawing.
After this you can save and close the drawing.
Getting ready with the Revit Software
As the next step open the Revit software and click on the new option under the project section in the home tab.
Select the required template from the list or browse for the template.
I have used the default template from the US English-Imperial folder as shown below.

This will open a default Revit file.
You can check if the two levels are available under the floor plans as shown below.

Importing AutoCAD file to Revit
As the Revit template is ready you can now import the AutoCAD file to Revit software.
There are two methods by which you can do so:
1. Link CAD
Using this method you can link the AutoCAD file to Revit.
So, if a file is linked it will update automatically in Revit if the CAD file is changed and saved in AutoCAD.
66 lessons| Easy Level
This course is for an absolute beginner of Revit architecture software. If you want to get started right from scratch then this is the course for you.
This is the recommended method as this will allow you to have the freedom to make changes to the Revit file whenever the AutoCAD file gets an update.
The only drawback here is that if you accidently change the file location of the AutoCAD file then the file will not show here in the Revit software.
2. Import CAD
In this method the CAD file is directly imported and saved as an element in the Revit file.
Here you will not get any update even if the original AutoCAD file changes.
Here we are going to use the Link CAD option.
As you are on level 1, you can click on the insert tab under ribbon palette and click on the link CAD option as shown below.

Now you can browse to the location where you have saved the ground floor and first floor separately.
In the link CAD format dialog box, you can select the necessary options.
For our example, I am using the following options:
Color | Black and white |
Layers | All |
Import Units | Auto- detect |
Positioning | Auto- Origin to Internal Origin |
Place at | Level 1 |
Now I will select Ground floor AutoCAD drawing and then click Open.
This will open up the ground floor plan in Revit software as shown below.
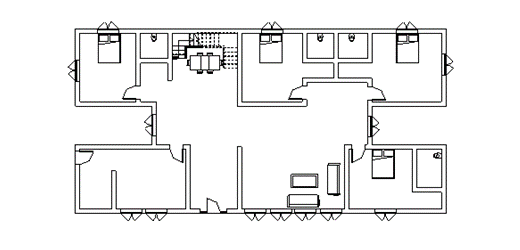
You can now open up Level 2 from the project browser and repeat the same steps as mentioned above.
In the Link CAD Formats, select the first-floor plan and make the same settings as earlier and click open.
You will notice that the first-floor plan is inserted exactly above the ground floor in its accurate location as shown below.
This is happening because when preparing the AutoCAD file, we aligned the base point of first floor plan with ground floor plan.
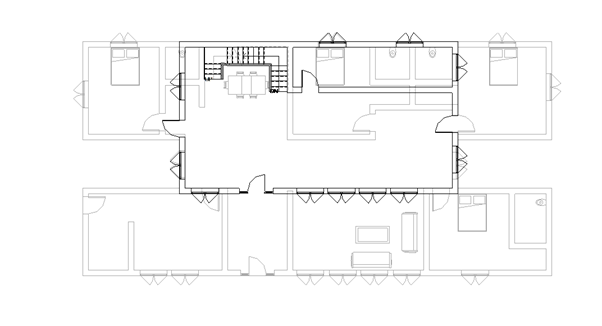
Still, if you feel like there is any mismatch in the attached file, you can always use the align command which is available under the modify tab in the ribbon pallet to change the location of the attached drawing.
Detailing the CAD file
Once the CAD file is linked into the software it also brings in the layers into the software.
If you need you can delete certain layers from the software.
Here we will delete the layer furniture from the file.
For that we will select the CAD file under the level 1 and click on the delete layer option under the modify tab as shown below.

From the list of layers, we will select Layer I-FURN and click okay to delete it as shown below.
This will delete all the objects that are associated to that particular layer.

Additionally it is always good to make the attached file as half tone as it will help us in creating walls and other elements clearly on top of the imported floor plan.
With level 1 active, you can type the VG in the Revit software so that the visibility/graphics dialog box pops up.
In this dialog box click on the imported categories as shown below.

Then check the box that has halftone option as shown in the image above.
Once you check the box and click OK you can see that the brightness of the file attached has been reduced.
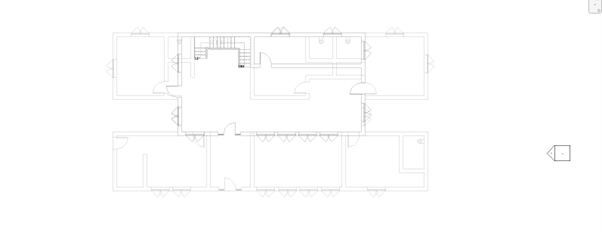
Repeat the same with the Level 2 to get the final design as shown below.
Starting the drawing
Now that you are all set with the linked CAD file you are ready to start drawing the elements in the Revit software.
66 lessons| Easy Level
This course is for an absolute beginner of Revit architecture software. If you want to get started right from scratch then this is the course for you.
You can start with Walls then insert doors and windows on the exact location as per the linked CAD file as shown below.

You can also find the progress of the design in the 3D view of the drawing as shown below.

Removing the Linked CAD file
Once we are done making the design, you can delete the AutoCAD file from the design as the 2D diagram is no longer required after adding its 3D Revit.
So, to remove the linked CAD file, you can click on the Manage link icon under the insert tab in the ribbon palette.
Once the manage Link dialogue box opens up you can go to the CAD formats tab and select both the linked CAD file by pressing the Ctrl key.
Then you can click Remove and press OK to remove the file from the Revit file list as shown below.

Method 2: AutoCAD to Revit Family
If you need a Revit family but all you have is a DWG file, then you can import it into Revit as a family.
So, in this section I will show you the step-by-step method of importing a DWG AutoCAD file into Revit as a family.
Preparing the AutoCAD 3D model
For this example, I am using a 3D AutoCAD model of a chair as shown in the following image.
This is a drawing that I downloaded from Bibliocad.

You can use any 3D object for this example.
Once you have the file, open it up in the AutoCAD software and then start with the first step which is cleaning up the file.
Cleaning up the design
Delete any unwanted object from the drawing.
You may also delete any text or annotation that is applied to on the design.
Check for the layers available and make necessary changed to the layers if required.
Here I am renaming the required layers so that they are more descriptive.
You can also use the purge command to purge any unwanted items available in the design including layers, blocks, text and dimensions styles.
After cleaning the drawing, I will save it as a DWG file.
Getting ready with the Revit Software
Now you can open up the Revit software and click on the new option under the Families section in the home tab.
Browse for the required template from your computer.
I have used the Generic Model template from the US English-Imperial folder as shown below.

Insert the CAD file to Revit
As the file opens up in the default Generic model template, you can now add the CAD file into the software.
For this you can go to the insert tab and select Import CAD and select the file we just saved as shown below.

In the Import CAD format dialog box, you can select the following options:
Color | Preserve |
Layers | All |
Import Units | Auto- detect |
Positioning | Auto- Origin to Internal Origin |
Place at | Level Ref Plane |

This will open up the 3D Chair Cad design to Revit software.
You can type the command WT and ZA and all the view will get tiled up as shown below.

Saving the Model as a Revit Family (RFA)
Now that you have inserted the file you can save the file as a Revit family file.
You can press CTRL +S or you can click Save as from the Application menu bar and save the file as a RFA file as shown below.

Inserting the Saved RFA model to a project
You can now open up any project in Revit.
I will open up the file that we created in our previous example and then I will go to the Level 1.

Now you can click on the components option under the Architecture tab and then click on load family.

In the Load family dialog box, you can browse to the location where you have saved the 3D chair design.
Select it and load it into the software as shown below.
Now you will notice that the file has been added into the software and you can place the chair anywhere required in level 1.
I will place two chairs near the Sofa as shown in the image below.

You can always press space bar it you want to rotate the object before placement.
Assigning Camera to view the 3D chair
Once you have placed the chairs you can assign a camera view to view the 3D Chair in place in the floor plan.
For that select the view tab then under the view tab drop down select the 3D view to select Camera.
Now place the camera in the design so that you can view the objects as shown below.

And now you can see that the chair is placed perfectly as a 3D object in the Revit Software.
Summary
So, as you can see its quite to easy to import AutoCAD files into Revit as simple drawing and also as a family.
Have you tried these methods to import AutoCAD files into Revit?
Let me know in the comments down below.


