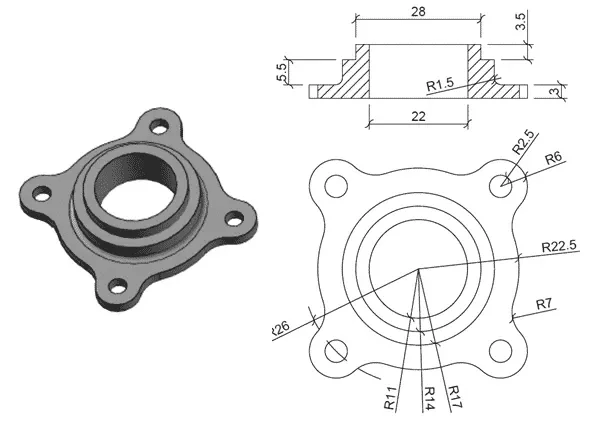
In this tutorial I will show you the step by step method of making the 3D part shown down below.
You can try it yourself using the dimensioned drawing or follow along the tutorial.
Step 1: Making Circles
Create the following circles using CIRCLE command from draw panel of home tab.
Make sure circle with radius 2.5 units has its center on the circumference of the circle with radius 26 units.
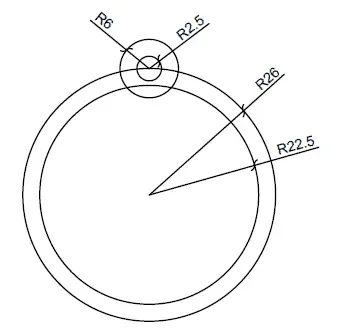
Step 2: Polar array
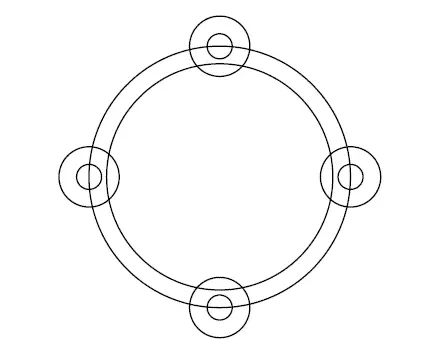
Select Polar Array from the Modify panel of Home tab and select two small circles on the top of geometry.
Now specify the center of the largest circle as the center of the array and enter 4 in the Number of Items field.
You will get an array like the one shown in the image below.
Step 3: Clean geometry
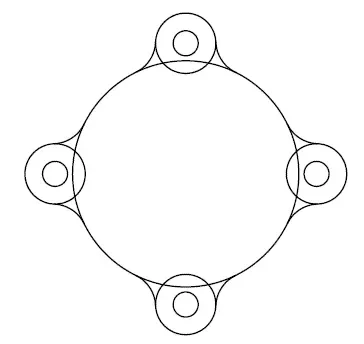
Delete the biggest circle and select FILLET command now enter R on the command line and type 7 as the fillet radius.
34 lessons| Intermediate Level
Practice your AutoCAD skill with real world 3D drawings from different engineering disciplines.
Now apply this fillet at the intersections of the circle with R2.5 and R22.5 as shown in the image below.
Step 4: Making outline
Trim all the geometries to make it look like the image below.
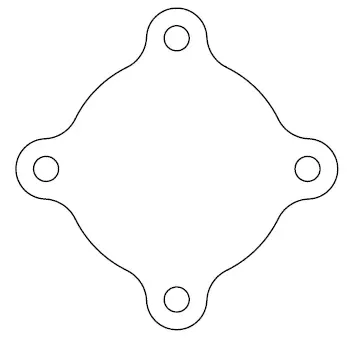
Step 5: Joining sketch
Type J on the command line and press enter then select complete geometry and press enter again.
This will join all external 2D segments into a single unit.
You may need to repeat the JOIN command couple of times to join the geometry completely.
Step 6: Changing visual style
Change view to southwest isometric and visual style to Shaded from Views and Visual styles panel of Visualize tab.
Step 7: Converting into 3D
Type PRESSPULL on the command line and click at a location inside the geometry.
Make sure you are clicking inside the geometry and not on the geometry.
Enter the height of 3 units on the command line and press Enter again.
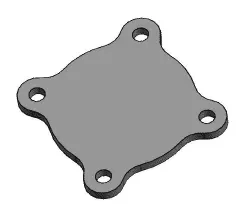
This command will add the thickness of 3 units to the 2D geometry which we have made so far and your drawing will look like the image shown above.
Step 8: Making sketch on 3D plane
Create a circle of R17 on the top of the object made in previous step.
For making a circle on top plane you need to make sure that dynamic UCS is turned on from the status bar toggle.
Press F6 to turn on dynamic UCS then select circle command and move your cursor to the top plane.
Now click at the center of geometry for circle’s center and enter a radius of 17 units and press Enter again.
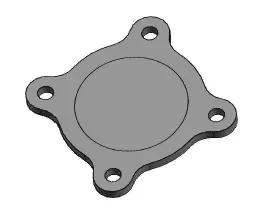
Step 9: Extruding sketch
Type EXT on the command line and press enter then select the circle we have drawn in previous step and press enter again.
Enter a height of 5.5 units and press enter again to exit the extrude command.
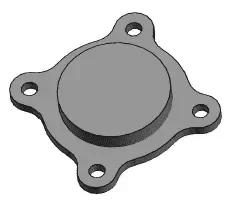
Step 10: Making more extrusions
Now create another circle of radius 14 units with the same center on top of geometry which we have drawn in the previous step.
Then extrude it by 3.5 units the same way we did previously.
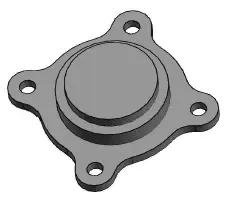
Step 11: Combining 3D parts
Now type UNION and Press ENTER then select complete geometry and press enter again.
This will ensure that all geometries get combined as a single unit.
Step 12: Creating hole
Create a circle of R11 on the top most surface of the geometry.
Now type PRESSPULL on the command line and press enter key then click inside the circle of radius 11 units and enter -12 as depth of geometry.
This will make a hole in existing geometry.
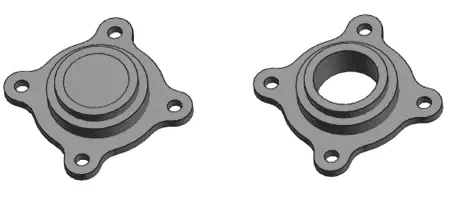
Step 13: Making fillets
Type F on the command line and press enter to start fillet command.
Type R on the command line and enter a radius of 1.5 units for the fillet.
Now select the edge between the flat piece and the biggest cylinder as shown in the image below and press enter twice to exit the command.
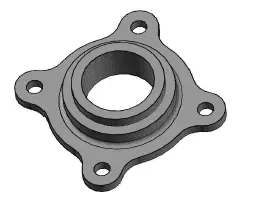
The final geometry will look like the image shown above.
Summary
This is a simple 3D part that I am sure you must have made by now.
If you have questions related to this tutorial let me know in the comments below.


