AutoCAD has lots of materials in it's Materials Library that can be directly used in your drawing without making any changes.
But, if you need a specific kind of material with some unique properties then you can easily create custom material in AutoCAD.
In this article I will explain how to create one such material from scratch and also how to apply it to objects in the drawing.
By the way I have explained all about applying materials and creating photorealistic rendering in AutoCAD in our 3D AutoCAD course.
Preparing texture image
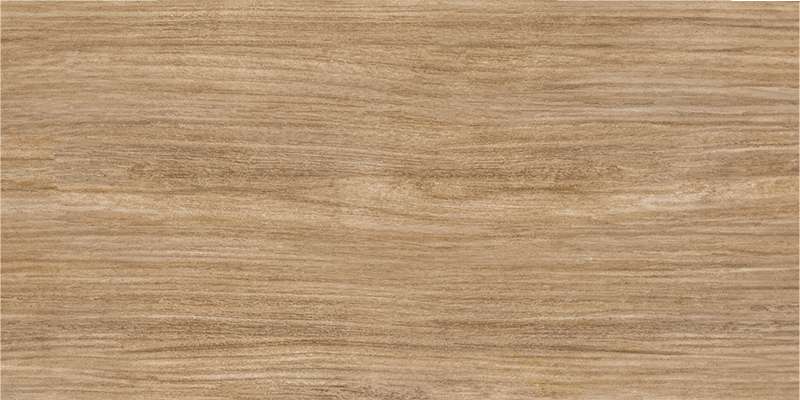
I will use the wood texture as shown in the image here as our sample material.

To follow along you can download the wooden texture image here.
After downloading the image covert it into a square dimension preferably of 600x600 PX for best results.
I have also prepared this video to explain the article in detail, but if you prefer the article instead then read on.
Creating Material
Open AutoCAD and switch to 3D modeling workspace then type RMAT on the command line and hit enter.

A materials browser palette will pop up as shown in image above.
Click on “creates a new material in the document” button on the bottom left of this palette and select New Generic Material from the drop-down menu.

A new Materials Editor palette as shown in image above will show up.
Give your material a name, for this example, I will name it as "oak wood custom".
Now move to the Generic panel and expand it.
Then click on image box and select oak wood 600×600 image.
The texture of sample material will change in the preview panel of Materials Editor palette.
Now change glossiness value to 30 and select Non-Metallic from Highlights drop down menu.
70 lessons| Easy Level
If you are absolute beginner of AutoCAD then you can get started right from scratch using this free course.
You can change other parameters as well on materials editor to fine-tune properties of your material.
Double click on the image of oak wood on materials editor palette, a new Texture Editor palette will pop up.
Scroll down in this palette expand Scale tab and change the sample size to the value which is suitable according to the current scale of objects in your drawing.
I have changed values to 1 unit in Width as well as the Height field.
Also, make sure Tile is selected in the Horizontal and Vertical fields of Repeat panel.
Don’t change any other parameter on this palette and close all open palettes.
Congratulations! you have created your own custom material in AutoCAD.
Applying Material
Now create a box in drawing area with the length, width and height equal to 10 units.
You can use BOX command and type @10,10,10 on the command line and press Enter to create the box.
Change visual style to Realistic using View tab’s Visual Styles option.
Type RMAT again on the command line and hit enter.
You will see oak wood custom material among other materials on top of materials browser palette as shown in image below.

Drag and drop this custom material on the box you have created in the drawing area.
The material properties will be immediately applied to the 3D object.
I have tried this material on different geometries and it looks like image shown below.

Transfer material to another drawing
You can transfer this material from one drawing to another by simply copying any object containing that material to another drawing.
Simply select any object where your custom material is applied then press CTRL + C on your keyboard.
Now go to the drawing where you want to transfer this material and press CTRL + V on your keyboard.
The object along with the custom material is now transferred to the new drawing.
You can now delete the object copied and you will still have the material in the new drawing in the materials browser palette.
Just make sure you don't delete the original image that was used to create the custom material else the texture won't work.
It's better to copy paste this texture image in the support file path where all AutoCAD drawings can access it.
To get the support file location type OP and then press enter key.
Now on the options window select the files tab and expand the "Working support file search path" and there you will see the support folder location as shown in the image below.

Summary
So, as you can see its quite easy to make any type of custom material using AutoCAD material browser.
You can even make material with cutouts like trees and material with illumination like light bulb.
Did you try making this custom material in AutoCAD? Let me know in the comments down below.


