How to Create a Revit Site Plan using Civil 3D Survey Files
Creating a seamless workflow between Revit and Autodesk Civil 3D greatly improves the designers and engineers collaboration and work efficiency. Combining…
Creating a seamless workflow between Revit and Autodesk Civil 3D greatly improves the designers’ and engineers’ collaboration and work efficiency.
Combining these two software will enable you to visualize topography in Revit, making it easier to align site plans and buildings with actual conditions.
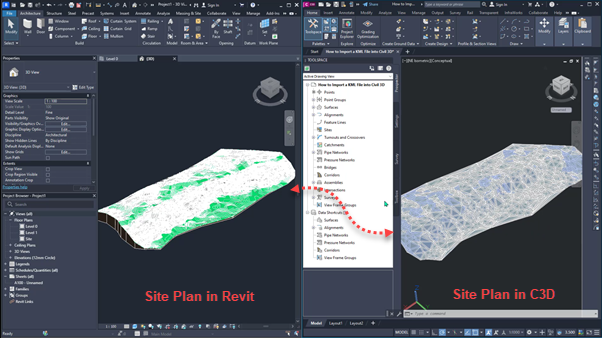
In this detailed project-based guide, I will walk you through the step by step process of importing a Civil 3D CAD file into Revit and creating a site plan.
For a more visual walkthrough, kindly check out the accompanying video.
Cleaning up the Civil 3D Drawing
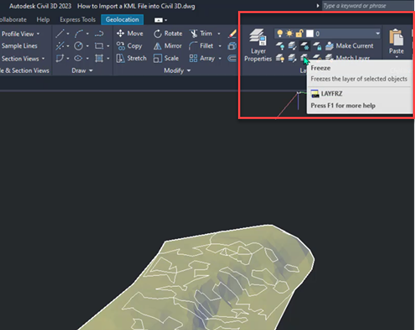
Before exporting your Civil 3D drawing to Revit, ensure all unnecessary layers are turned off or frozen.
To do so, navigate to the Layers panel, under the Home tab and in the drop-down list freeze or turn off the layers.
Configuring Export Autodesk Civil 3D Drawing Settings
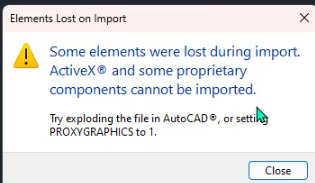
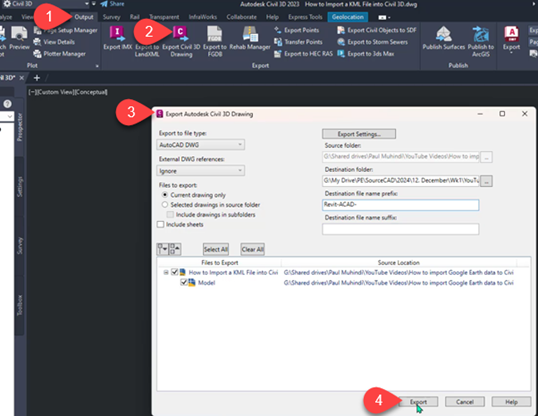
If Revit gives a warning prompt that some of the elements were lost during import, go back to the Civil 3D drawing file and under the Output tab, select Export Civil 3D Drawing to open the Export Autodesk Civil 3D Drawing floating window.
Change the Civil 3D format to AutoCAD DWG format, and link any external references present in your drawing.
In our case, I do not have any, so I will input Ignore, attach any drawings to be exported with your drawing, if any, and configure the export settings to specify the version in which the AutoCAD dwg will be exported at and then click on Export.
Exporting Civil 3D dwg to Revit
Launch your Revit software and open a new architectural model.
Navigate to the Insert tab, and under the Link panel, select Link CAD to export it to Revit.
A Link CAD Formats floating window will open.
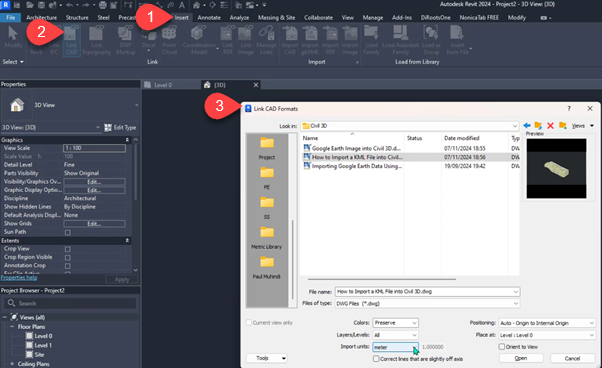
Here, you will configure the settings and select your CAD drawing to be linked to the Revit file.
Alternatively, you can select Import CAD to bring the CAD drawing into your drawing sheet.
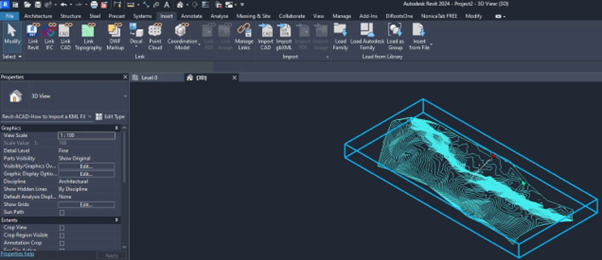
Linking CAD is a preferred method of attaching CAD drawings to Revit because any changes made in the Civil 3D drawing are reflected directly in the CAD drawing already attached to the Revit file.
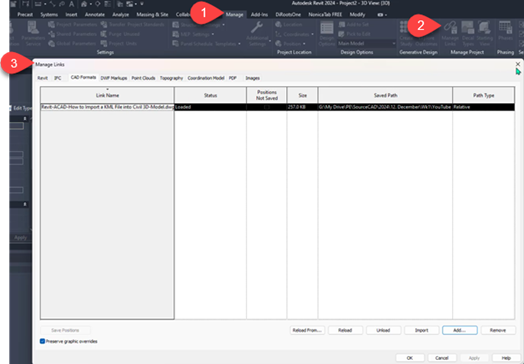
To view the file linked to your Revit file, navigate to the Insert tab and under the Links panel, select Manage Links.
Alternatively, navigate to the Manage tab and under the Manage Projects panel, select Manage Links.
Transforming the CAD drawing to a Topographical solid within Revit
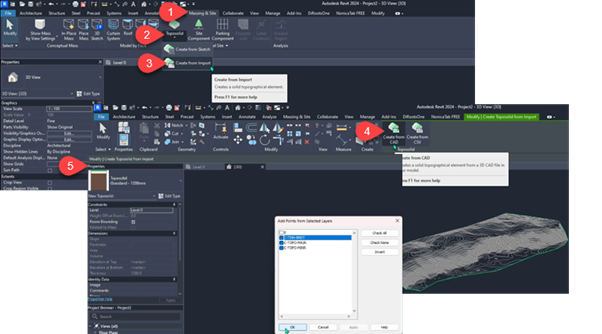
Navigate to the Massing & Site tab, and under the Model Site panel, select Toposolid and in the drop-down menu, select Create from Import.
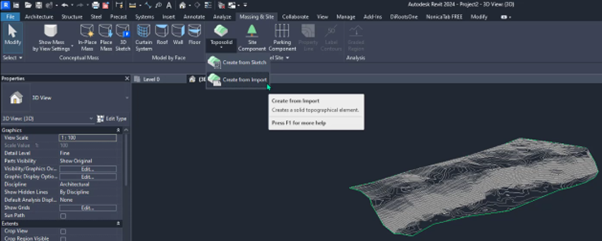
Under Modify/Create Toposolid from Import, select Create from CAD.
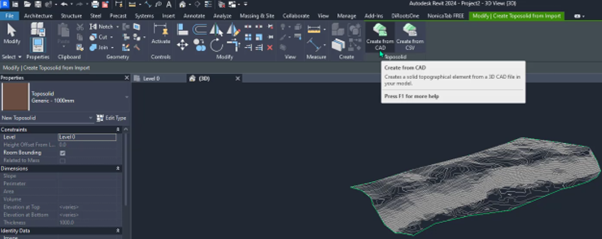
In the Properties menu, specify the material of the toposolid, and confirm your levels.
Select the CAD drawing on your Revit software.
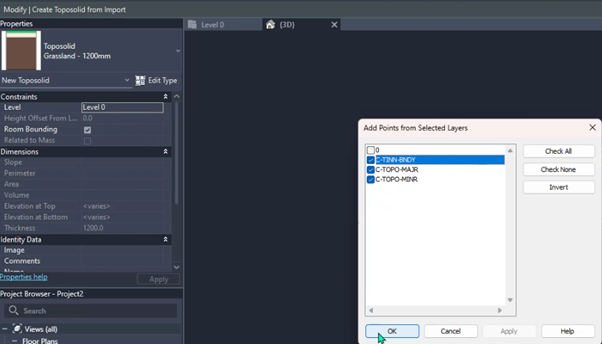
Add Points from the Selected Layers floating window will open and here you can select the layers that will be converted into a toposolid.
Having done that, you can now, click on OK.
To only work with the toposolid, unlink the CAD file from the Revit model.
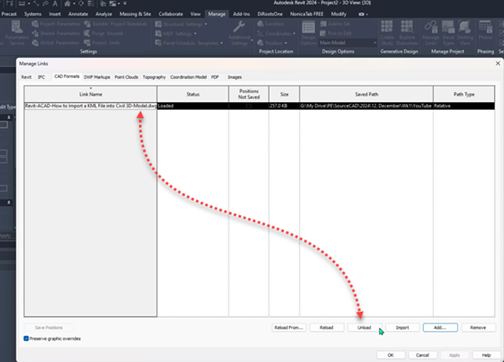
Navigate to the Manage tab, and under Manage Projects, click on Manage Links, select the CAD Formats option, select the attached link and select Unload.
Aligning levels to the topographical solid created
In your Revit model, you may observe that the levels created are far from the toposolid.
To align the levels, navigate to one of the elevations.
Here you can easily select your levels and drag them to where you would like to place them on the toposolid.
Right-click the levels and ensure to Maximize 3D extents so that the levels cut across the toposolid area.
In this example, our Level 1 will be at the base of the toposolid whereas Level 2 will be at the top of the toposolid.
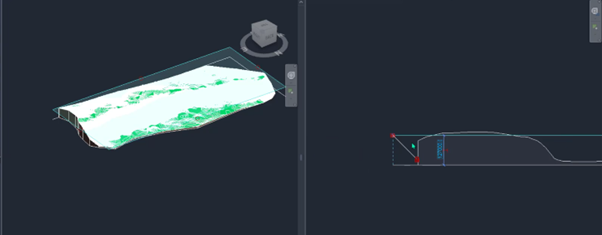
How to change the topographical solid units of measurement
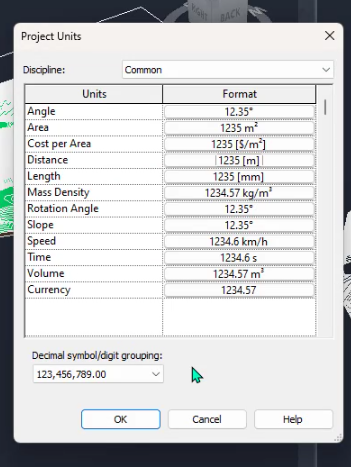
To ensure consistency in units throughout your project drawing, navigate to the Manage tab, and under settings, select Project Units and change the units to Imperial or Metric depending on the Project requirements.
In this example, I will set my Metric Units as Meters.
Frequently Asked Questions
Here are some of the questions that our students ask quite frequently.
How do I resolve overlapping topography after importing?
This issue can arise from errors in the contour data.
Ensure that all the contour lines are continuous and non-overlapping.
Check the Topo Surface Creation tool in Revit and choose contour layers to include.
Can Revit massing tools be used for site planning instead of importing CAD data?
Absolutely, yes!
Though it has its down sides whereby they lack the precision and detail of a CAD survey.
Summary
Integrating Civil 3D CAD file into Revit, creates possibilities for site planning and BIM collaboration.
Practice this guide using the example files in the YouTube video.
Watch, learn, and build your expertise in creating Revit Site Plans using Civil 3D CAD survey files!
For any questions or clarifications, drop them in the comment section below.