How to Create Revit Families, complete tutorial
Creating custom Revit families is a vital skill for architects, engineers, and designers who use Building Information Modelling (BIM) to streamline their…
Creating custom Revit families is a vital skill for architects, engineers, and designers who use Building Information Modelling (BIM) to streamline their projects.
By developing these families, you can design reusable elements that maintain consistency across your projects.
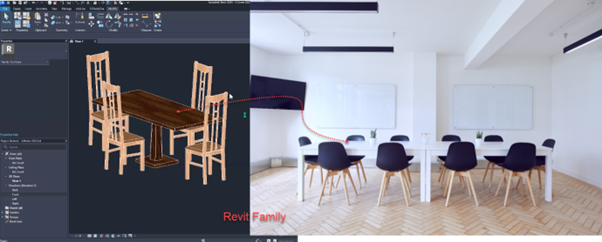
In this guide, you will learn how to create a custom Revit family using a table as a practical example, while understanding the general steps that apply to any family creation process.
To get a detailed visual walkthrough, here is a video version of the article.
If however you prefer the article then read on.
1. Starting a New Revit Family Using a Template
The first step in designing your custom table and chairs is creating a new family.
A family in Revit refers to a group of elements with similar parameters and properties, which can be customized to your own preferred specifications.
To start, having your Revit software running, click on the File menu, then select, New, choose Family and from the list of the available templates, select the Furniture Template.
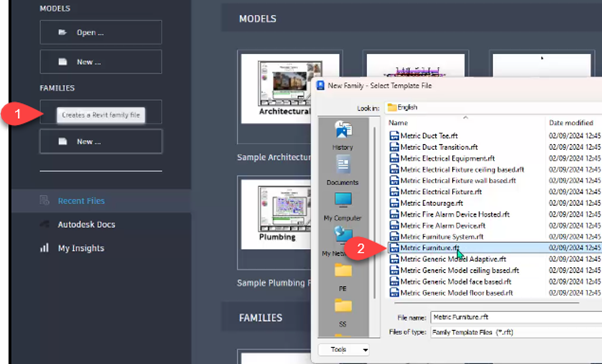
It is important to note that as this article serves as a guide using a furniture family, the same steps apply to any other family, e.g. doors, windows, etc.
At this point, you can now adjust the properties, dimensions, materials, and structure of the table and chairs.
Setting the parameters is necessary to ensure your table and chairs can be perfectly placed in your project.
2. Defining the Structure and Components of Your Revit Family
Now that your Revit family is set up, it is time to start building your table step by step as shown in the exhibit below.
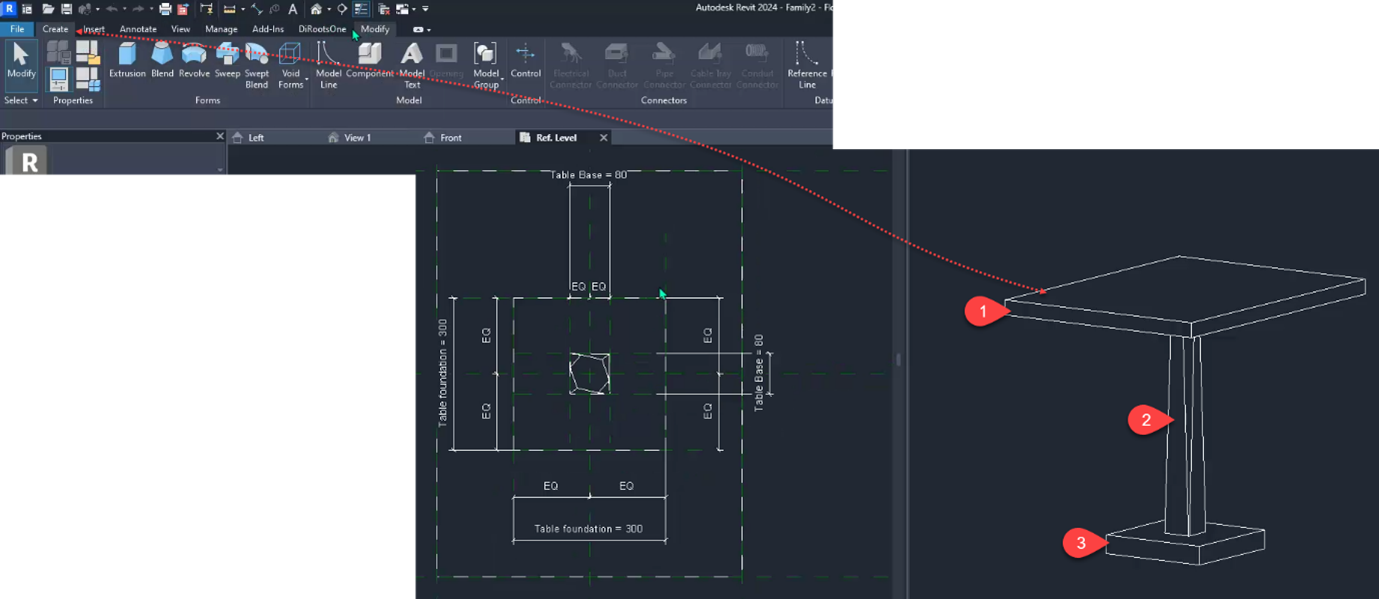
2.1 Setting up Reference Plane for your Revit family.
A reference plane in a Revit family acts as the foundational guideline for accurate alignment and consistent dimensioning.

For our table top, it establishes a fixed axis that ensures the geometry is precisely defined, making it easier to adjust and integrate with other components.
This reliable framework not only enhances the overall precision of the design but also supports future modifications, ensuring the table top remains proportionally accurate within the family.
To get to the Reference Plane, navigate to the Create Tab, then under the Datum panel click on the Reference Plane to place and modify your reference plane on your workspace.
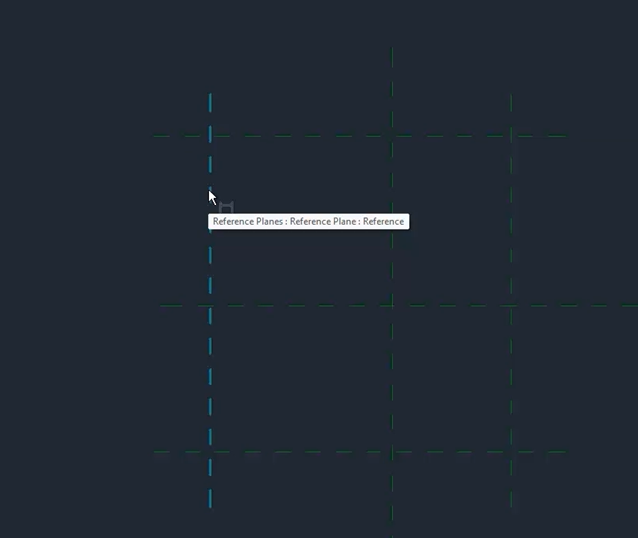
Now, to transform the flat 2D sketch from our reference plane into 3D, there are various tools in Revit that facilitate this.
2.2 Working with the Extrusion tool for your Revit Families design.
On your Reference level, draw and define the table top shape by using the Extrusion tool under the Create tab.
The Extrusion tool allows you to define the shape and thickness (depth) of the component’s outline, which make it possible to create dynamic parametric families in Revit.
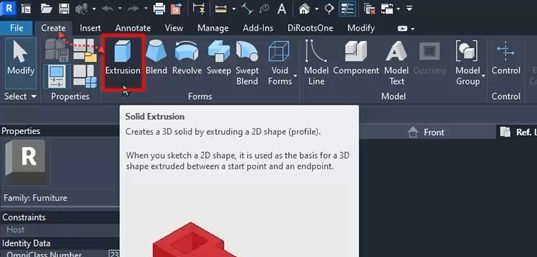
In this example, I will make a rectangular table top, but you can model any shape based on your project requirements.
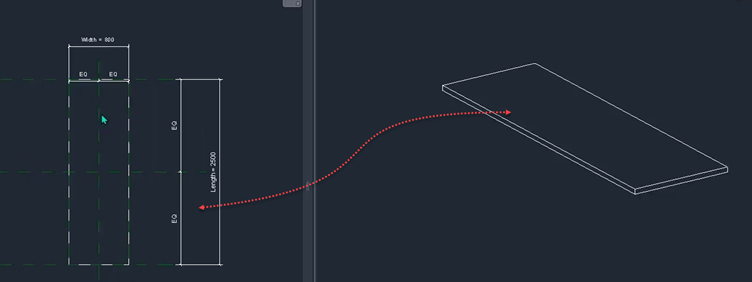
The same steps are therefore repeated to model the base of the table.
Other than just extruding, there are other options to making 3D objects from 2D parts.
2.3 Working with the Blend tool for your Revit Families design.
Navigate to the Create tab, click on the Blend option, and use the Rectangle option, under Draw tab to create the table stand base.
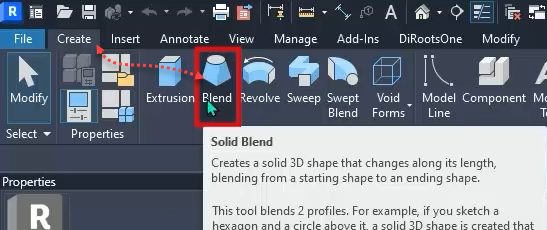
The Blend tool is essential for creating smooth transitions between different shapes in your Revit family.
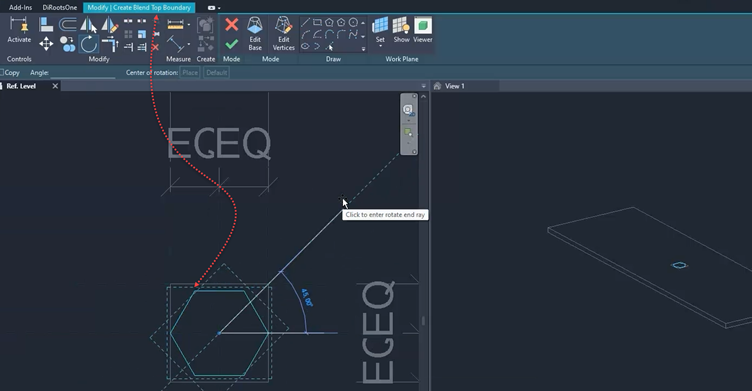
In this example, when designing the table pole, the Blend tool allows you to combine varying cross-sectional profiles into a unified, elegant form.
3. Adding Custom Parameters and Additional Components
Okay let’s now move to adding parameters and some extra components in our Revit family.
3.1 Adding Custom Parameters
Adding dimensions to reference planes is a fundamental step in making your Revit family parametric, as it allows the geometry to automatically adjust based on defined measurements.
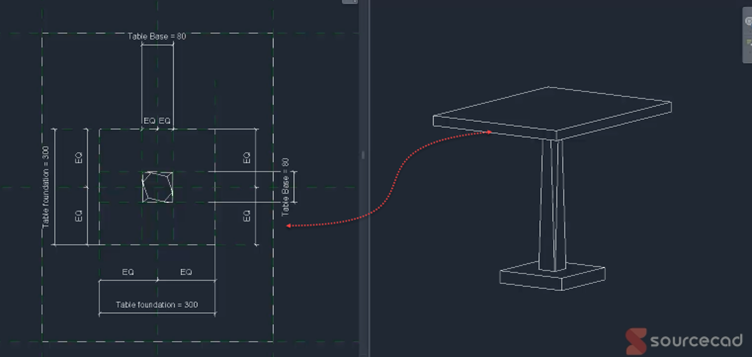
When you place dimensions on the reference planes, you are establishing clear spatial relationships that control the size and positioning of your model, such as the table top in our example.
By using the Create Parameter tool located in the dimensions contextual ribbon, you can convert these dimensions into adjustable parameters.
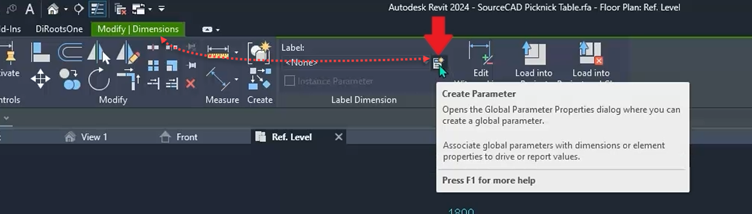
This process involves selecting a dimension, clicking the Create Parameter button, and then assigning a name, type (like length or width), and whether it is an instance or type parameter.
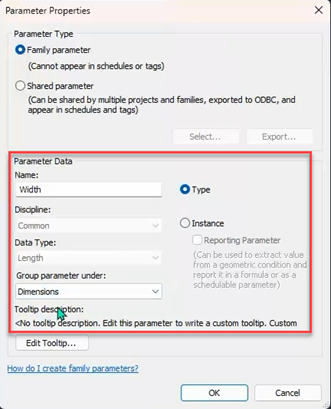
Once set up, these parameters allow you to change values on the fly, with the geometry updating instantly to reflect the new dimensions.
If you want to review the parameters you have defined, simply navigate to the Family Types tool, which is also available under the Modify tab.
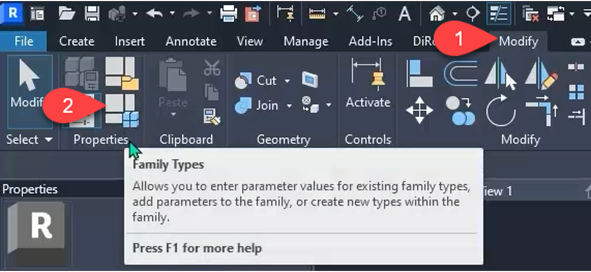
This tool opens a menu that displays all your established parameters, whether they are instance or type parameters.
In this case, as we are designing for a table, the parameters that you could have are like length, width, table base, table foundation, etc.
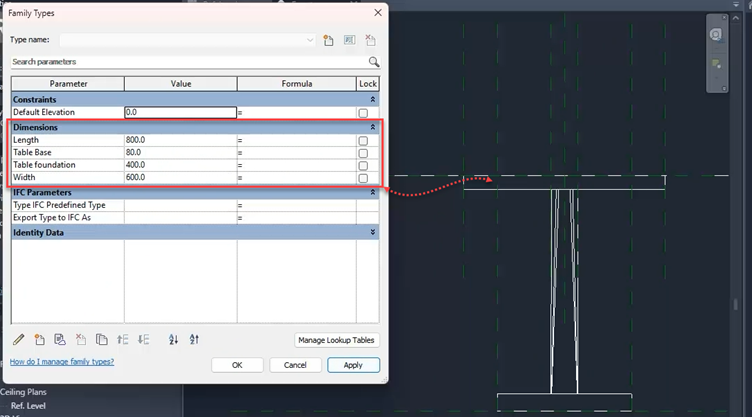
By examining this list, you can verify the current values, make adjustments, and ensure that your model reacts as intended to any changes.
This not only ensures consistency and precision across your design but also enables easy modifications and testing of different configurations without needing to redraw components manually.
In essence, parametric dimensions empower you to maintain full control over your design, streamlining both the initial creation process and any future adjustments.
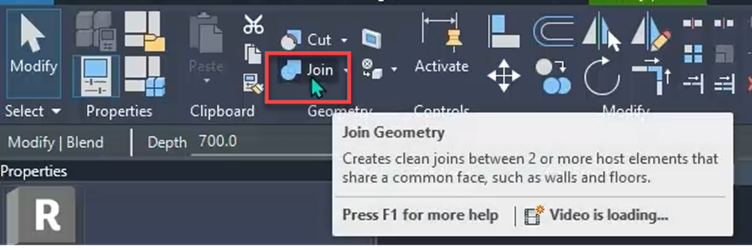
If you are working with multiple 3D objects in your Revit Family, you can use the Join tool to merge the different objects into one object.
In this case we can merge the table’s base, counter-top and stand into one object.
3.2 Additional Components like existing families into the family
After modelling the primary structure, you can further enhance it by bringing in existing families into the family.
For example, if you want to add chairs around your table, load additional families from the Revit library by using the Load Family feature.
To add the chairs, click on Insert tab then under Load from Library panel, click on Load Family then select Furniture to select the seats of your choice.
In this example, I used the Furniture_Chair_ Dining.rfa as the seat of choice.
To place the seats you have selected, navigate to the Create tab, then under the Model panel, and click on the Component option.
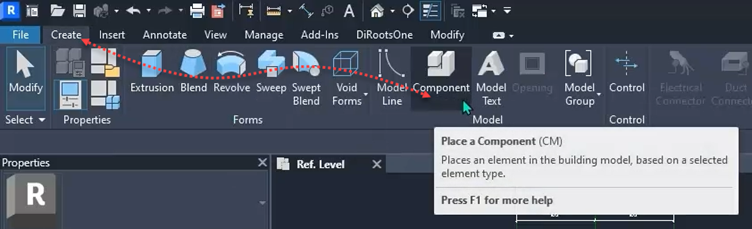
Insert these components into your family file and adjust their placement and offset properties to ensure they align perfectly with the table.
Under the Properties menu, use the Offset option to adjust the seat position and define the seat height relative to the table.
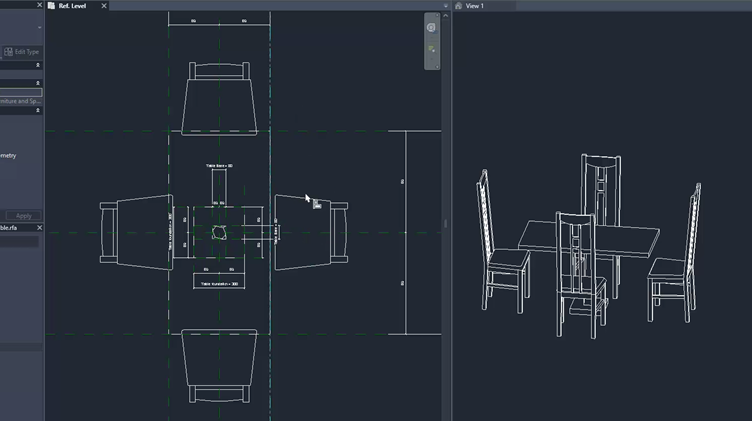
By aligning the seats with the table, you are able to lock them in place and this creates a cohesive table-and-chair set that you can place as one item in your project.
This step is crucial, as it introduces the concept of parametric design which is a key strength of Revit.
Remember to save your newly made Revit Family – Table to use it in your new or existing project.
Note: You may notice that you are not able to place some of the seats to be the same level as the table.
This is because they do not have the ‘Offset’ option, therefore, pick the seats that have the ‘Offset’ option.
3.3 Materials specification for Revit families
Specifying materials for your Revit families is vital for producing a realistic and functional model.
Within Revit, from the properties panel, under the Materials and Finishes section, as shown below, you may assign materials to different components of your family.
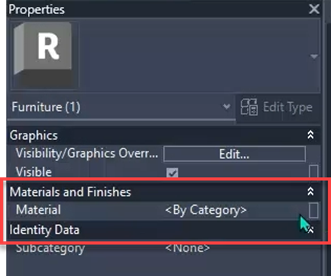
For instance, if you’re working on a table family, you might choose a warm walnut finish for the tabletop, a sleek Stainless steel look for the legs, and a robust Cast Iron for the base, each component gets its own unique character.
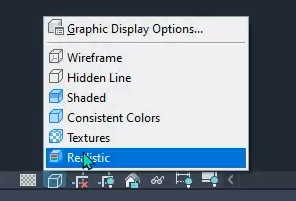
What’s even more useful is that by setting up material parameters, you can create multiple family types with different material combinations as shown below.
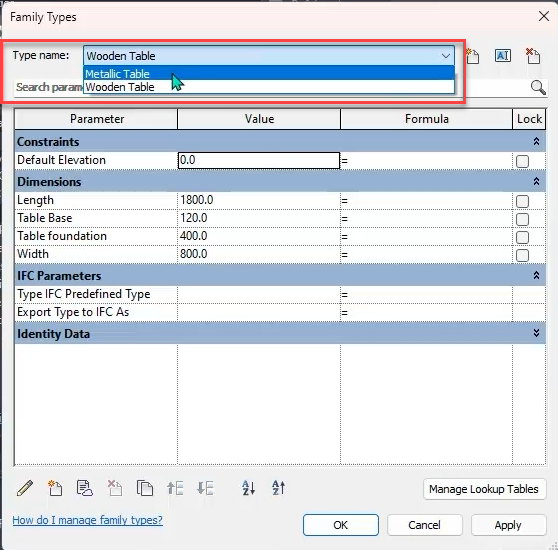
This means you can quickly switch between different finishes, such as wood, metal, or glass directly from the Family Types dialog.
This enables you to explore multiple design options and easily update your project to meet evolving design specifications.
4. Loading the designed Revit Family into an existing Revit Project
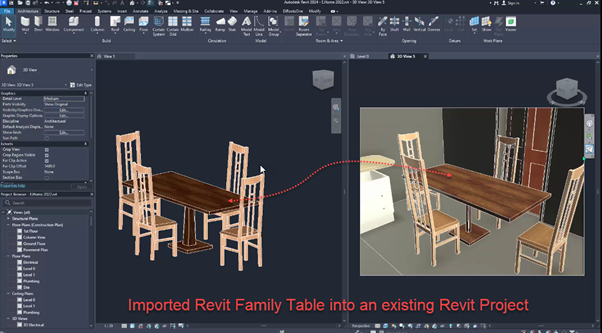
You can now load the custom-made Revit Family into a project that you were working on.
You will need to ensure you have saved all changes in your Revit family, then load it into the project by navigating to the Insert tab of the opened project, then click on Load Family.
Pro Tip: Save your custom family file with a clear and descriptive name.
Once selected and opened, your custom Revit family will appear in your Revit project’s family’s section.
Alternatively, you can leave your Revit family open, then open the specific model or project that you want to place your customized family, and under the modify tab in the Revit Family user interface, you will have the option of Load into Project.
Once selected, this option will allow you to place your family into your open project.

To place the custom-made Revit family in your model, under the Architectural tab use the Component tool.
Then click to drop your Revit Family Table in your design, ensuring proper alignment with surrounding elements within your project.
Furthermore, any changes to your Revit Family, in this case, the Revit Family table’s size parameters or material properties will automatically update across your project because the family is parametric.
This is the true power of Building Information Modelling (BIM), it allows for dynamic, intelligent objects that adapt as your design evolves.
Frequently Asked Questions:
Here are some of the questions that our students have asked about Revit families.
Once the Revit family is placed in the project, can one edit it?
Yes, you can fully modify the family at any given time.
This can be accomplished by either modifying it within the project or returning to the original family file to make the desired modifications.
Is it possible to add materials to the Revit family?
Without a doubt!
Material parameters can be established for each component in the family editor to facilitate the assignment of materials.
For instance, when working with a Revit family table, you can assign the materials for the table top, stand, and base and link them to the project’s material library.
Is it possible to create pre-set parameters for a Revit family that one can select from?
Indeed, it is feasible.
In Revit, it is possible to establish predetermined parameters for your family, which enables users to effortlessly navigate between various alternatives.
For instance, when designing a table, you can set up assorted sizes, materials, or configurations.
These pre-set parameters can be accessed from a drop-down menu when inserting the family into your project.
This not only saves time but assures consistency across your design.
Can I share my custom table family with others or use it in future projects?But of course, you can!
Once you have created your custom table family, you can save it as an external .rfa file and share it with others.
That makes it simple to reuse your designs in future projects or across your team.
Additionally, by storing it in a centralized family library like a shared folder, you can ensure that everyone in your organization has access to the same elements, keeping design standards consistent across multiple projects.
Summary
Creating a customized Revit Family not only raises your design productivity but also delivers additional flexibility, precision, and control over your design projects.
By following the processes mentioned above, you can develop different Revit Families that are perfectly suited to any area, project, etc., with customizable characteristics that save time and maintain consistency across your projects.
Whether you are constructing a table, doors, windows, or any other MEP or architectural Revit family elements, the method remains fundamentally the same.
Let us know about your experience in constructing this Revit Table Family in the comment box below.